
How to set up a turntable
Many entry-model turntables are ready to use out of the carton. They are factory-set with the correct weight for instant playback of vinyl - and they are a perfectly fine solution for many people.
When investing in a higher-performance turntable, setting the tonearm correctly is essential for achieving the best sound quality from your vinyl records. A higher-than-average-quality turntable will have two key features to calibrate for proper vinyl playback:
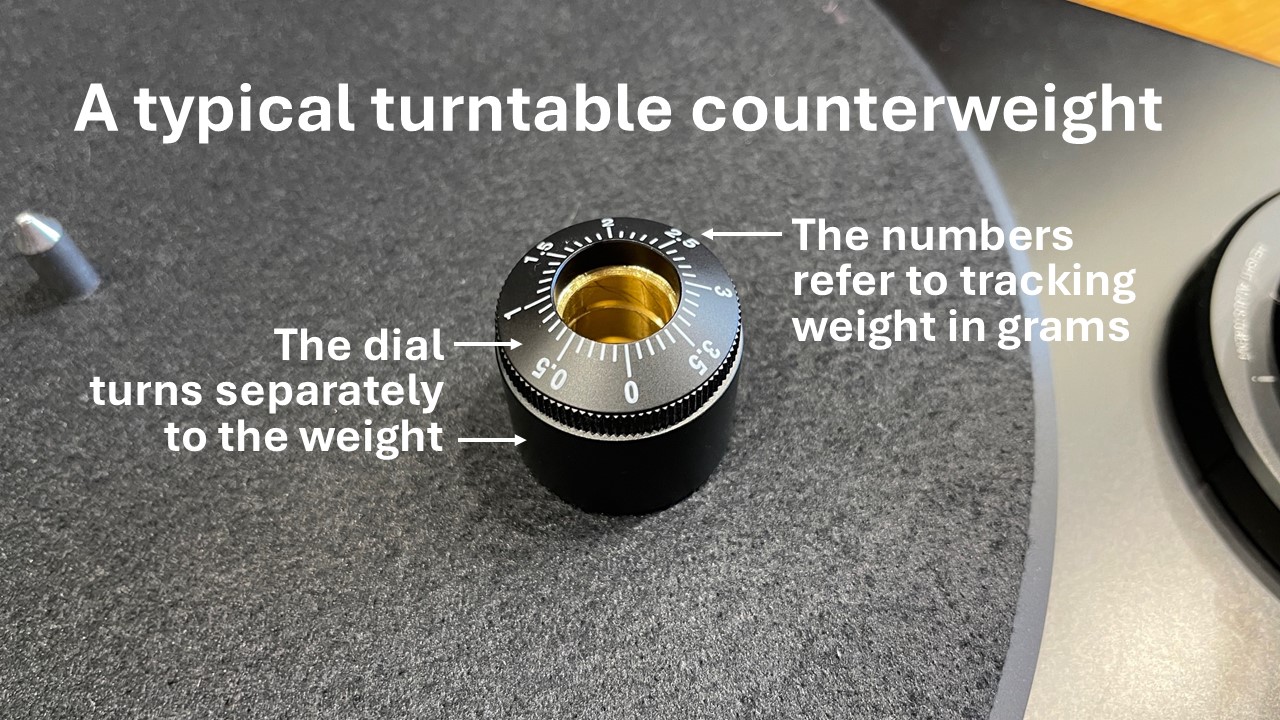
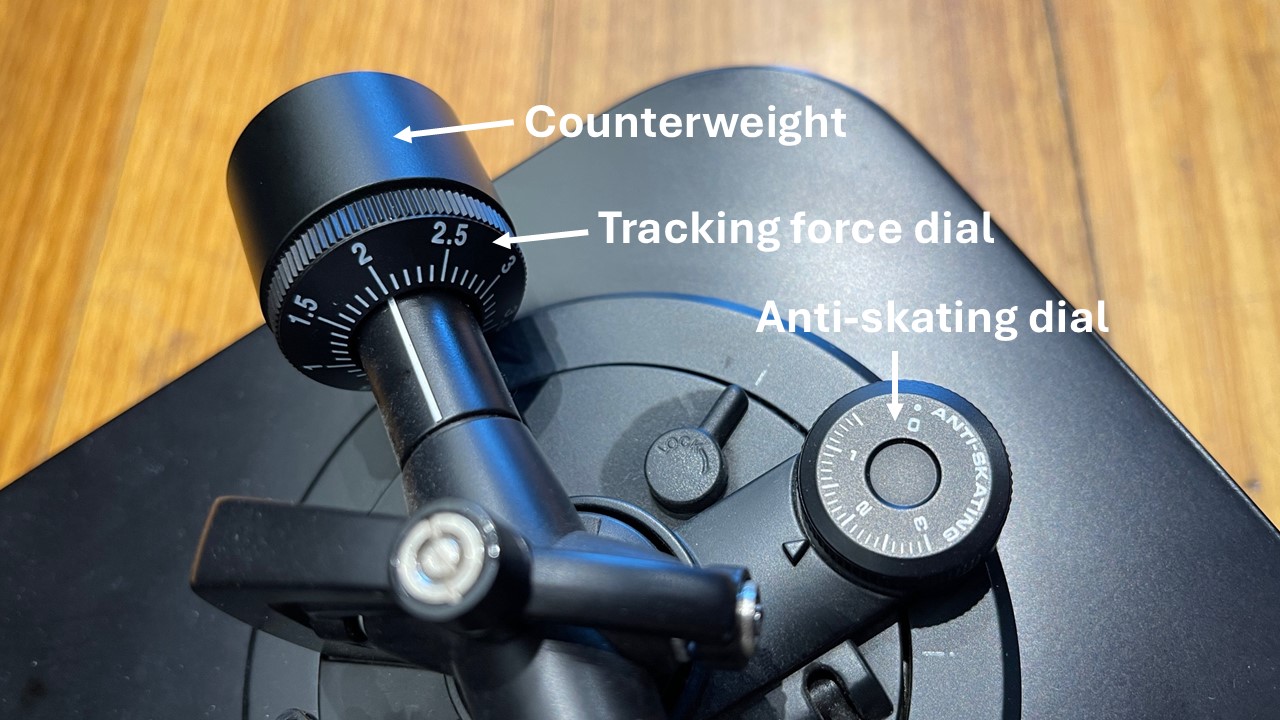
- An adjustable counterweight. A metal, slightly heavy cylinder with a hole in it to mount it on the back of the tonearm. It usually has a dial on the front with numbers and marks. The dial spins independently of the weight, for an important reason we’ll explain in step 3.4 below. A turntable counterweight allows exactly the right level of force to be applied by the stylus on the record’s surface. The benefit of an adjustable counterweight is that it allows you to upgrade your cartridge to a superior one with perhaps a different weight from the previous cartridge.
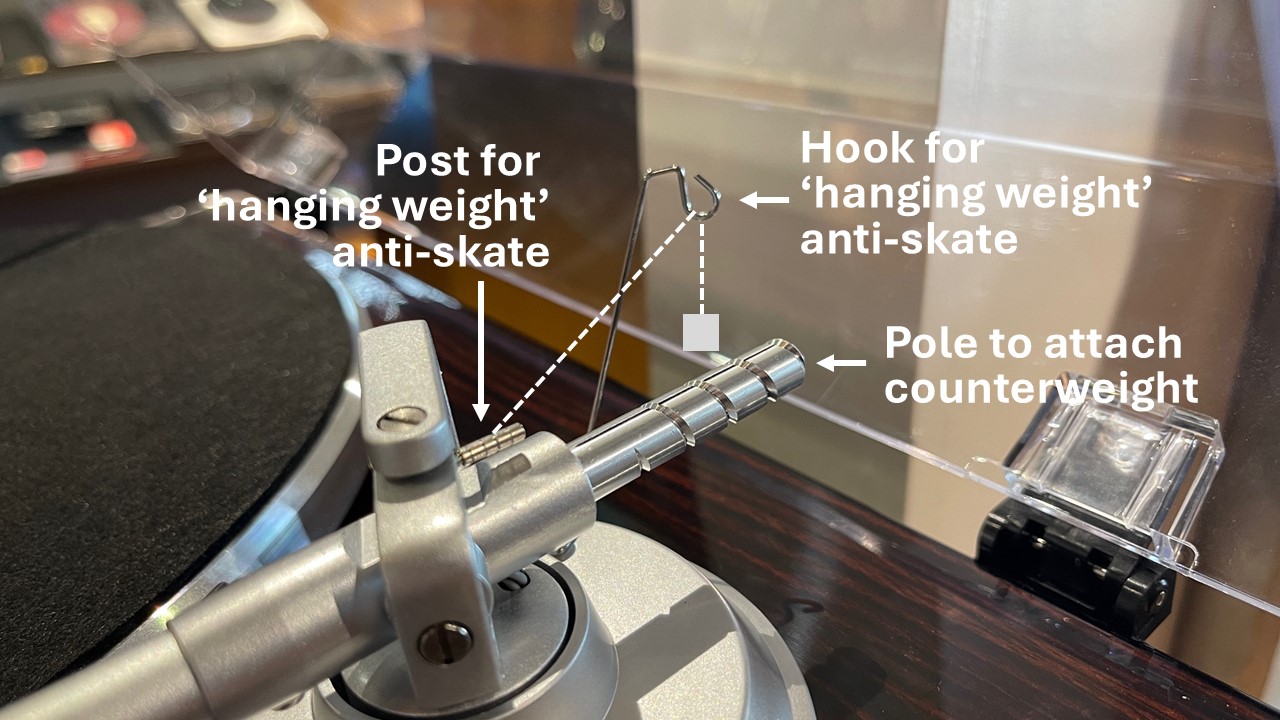
- An anti-skating control. This is a small dial with numbers near the tonearm, or a slider under the tonearm (Rega higher-end models), or sometimes it’s a 'hanging weight', a very small metal weight (like a sinker) attached to a very fine line (like fishing line) which hangs off the tonearm. Anti-skating is required to counteract the natural tendency of a tonearm to drift – or ‘skate’ - towards the middle of the record.
Turntable brands with adjustable counterweights and anti-skating type (dial, slider, or hanging weight):
- Audio Technica (higher-end models, dial)
- Denon (higher-end models, dial)
- Lenco (all models, hanging weight)
- Music Hall (all models, dial)
- Project (higher-end models, hanging-weight)
- Rega (higher-end models, slider)
- Technics (all models, dial)
Step 1: Unbox and Inspect Your Turntable
- Unpack Carefully: Remove the turntable and all components from the box. Make sure to keep packaging materials in case you need to move or store the unit.
- Inspect for Damage: Check for any visible damage or missing parts. Make sure the tonearm and platter move freely.
Step 2: Position and assemble the Turntable
- Select a Stable Surface: Find a sturdy, level surface for your turntable. Avoid placing it near speakers or on unstable furniture to minimize vibrations.
- Level the Turntable: Use a bubble level on the platter to ensure it is perfectly horizontal. Adjust the feet if your turntable has adjustable legs.
- Attach the platter and matt and loop the belt around the motor as per the instructions in your turntable owner’s manual. Direct-drive turntable don’t have belts, of course.
Step 3: Attach and Balance the Tonearm
- Attach the counterweight to the back of the tonearm, with the dial/numbered face pointing forwards.
- Remove the stylus cover. While it doesn’t weight much, it will slightly overstate the weight of the cartridge when attached, so it's better to set the weight with the cover removed.
- Lift the Tonearm. Gently lift the tonearm from its rest, being careful not to touch the stylus. Position the tonearm over the platter.
Step 4: Adjust the Counterweight:
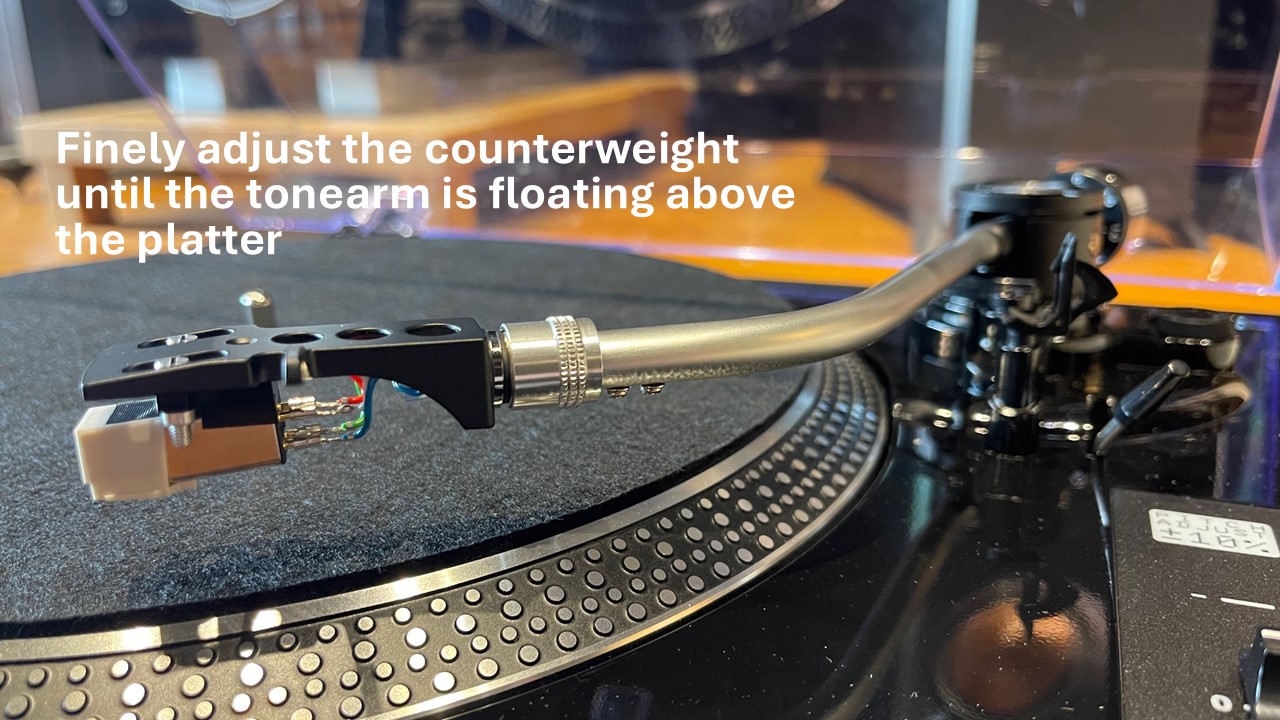
- The goal when adjusting the counterweight is to initially make the tonearm ‘hover’ or float over the platter – not too heavy, not to light.
- Gently turn the counterweight counterclockwise on the back of the tonearm. On most models, it will spiral inwards as you turn it. When you start, the tonearm will be too light as the weight is all at the back.
- Quickly you will get to a point where the weight has transferred to the front of the tonearm, and the tonearm wants to drop to the platter (remember to protect your stylus) and this means you’ve gone too far forwards.
- You must gently release your hold on the tonearm – while ever so gently turning the counterweight back-and-forth by tiny degrees – in order to establish the point where the tonearm floats above the platter - as in the image below.
Step 5: Set the tracking force:
- When the tonearm is floating above the platter, gently turn the dial on the front of the counterweight until the number zero is at 12 O'clock.
- Then, turn the counterweight towards you (note: NOT touching the dial, as it has to now rotate WITH the counterweight) until the number on the dial corresponding to the correct weight is now at the 12 O'clock position. As an example, if the correct weight is 2 grams of tracking force, set it to 2. (The turntable’s owner’s manual will tell you what the correct tracking force number is. It’s usually between 1.5 grams and 2.5 grams.)
- Once the tracking force is set, you can test the effectiveness. Lift the tonearm with the cueing lever, then lower it again. The tone arm should gently settle on the platter.
- This is usually a dial next to the tonearm, or sometimes a small slider located under the tonearm.
- Set the anti-skating dial/slider to the same number as the tracking force gram weight. E.g. – 2 grams of tracking force, 2 grams of anti-skating.
- If you have the ‘hanging weight’ type of anti-skating, loop the line over the small, notched post at the back of the tonearm, using the correct notch as specified in your turntable’s owner’s manual – there is usually only 3 or 4 positions to hook it. Then, carefully hang the weight over the support hook at the back. The anti-skating weight simply hangs there, doing its anti-skating job!
Step 6: Locate and set the anti-skate control:
Step 7: Final Checks
- Recheck Level: Ensure your turntable is still level after adjusting.
- Test with a Record: Play a test record to evaluate sound quality. Listen for balance and clarity across both channels. If one side sounds louder or distorted, revisit the anti-skate and tracking force settings.
Step 8: Enjoy Your Vinyl
After completing the setup, you’re ready to enjoy your vinyl records! Take a moment to appreciate the warm, rich sound that only vinyl can provide.
Handy Hints:
Regularly inspect and clean the stylus: When visible dust or debris is attached to the stylus, use a stylus cleaning brush to gently clean the stylus. You brush the stylus in one direction only, from back to front. Keep your records dust-free and clean the stylus regularly to prolong their lifespan.
When to change the tracking force and anti-skating: The only time you need to perform the tonearm setup procedure again is if you change your cartridge to a heavier or lighter one. Otherwise, it is ‘set-and-forget’. It’s wise to occasionally check the settings to ensure they have not altered over time or have been bumped.
Close your lid: When not in use, cover your turntable to prevent dust accumulation.
By following these steps, you’ll ensure that your turntable is set up properly for the best possible listening experience. Enjoy your music!
Recent Posts
-

Ortofon Transformer ST-7 MC Transformer
Elevating Moving Coil Playback to New Heights In the finely tuned world of analogue audio, every det …23rd Jun 2025 -

Tivoli Audio Revive
Where Sound, Light, and Style Converge In a world where space is precious and design matters, audio …23rd Jun 2025 -

Tivoli Audio Songbook in Blue/Gold
Portable, Stylish, and Full of Soul When it comes to blending timeless design with modern functional …22nd Jun 2025